
Choosing and Using a Tanking Kit for Flawless Waterproofing - An Ultimate Guide
Share
Picture this: you've just finished tiling your beautiful new bathroom. It looks stunning. But weeks or months later, you notice a damp patch on the ceiling below, or tiles starting to loosen, maybe even that musty smell of mould creeping in. The culprit? Water has found its way behind your tiles, penetrating the substrate (the wall or floor material) because it wasn't properly waterproofed. This is precisely the nightmare scenario a quality tanking kit is designed to prevent.
As a German tiler working in Ireland, I've seen firsthand the damage inadequate waterproofing can cause, especially with our damp climate. It’s not just about aesthetics; it’s about protecting the structural integrity of your home and ensuring a healthy living environment. In this guide, we'll explore everything you need to know about tanking systems, focusing on the reliability and performance you get from premium solutions, like those offered in the Tanking Collection at Sealantstore.ie.
What Exactly is a Tanking Kit and Why is it Non-Negotiable?
Think of "tanking" as creating a completely waterproof barrier or membrane between your tiles and the surface they are fixed to (the substrate). It's essentially creating a watertight "tank" in your wet area. A tanking kit conveniently bundles the essential components needed to achieve this.
While contents can vary slightly by brand and specific application, a typical high-quality tanking kit will usually include:
-
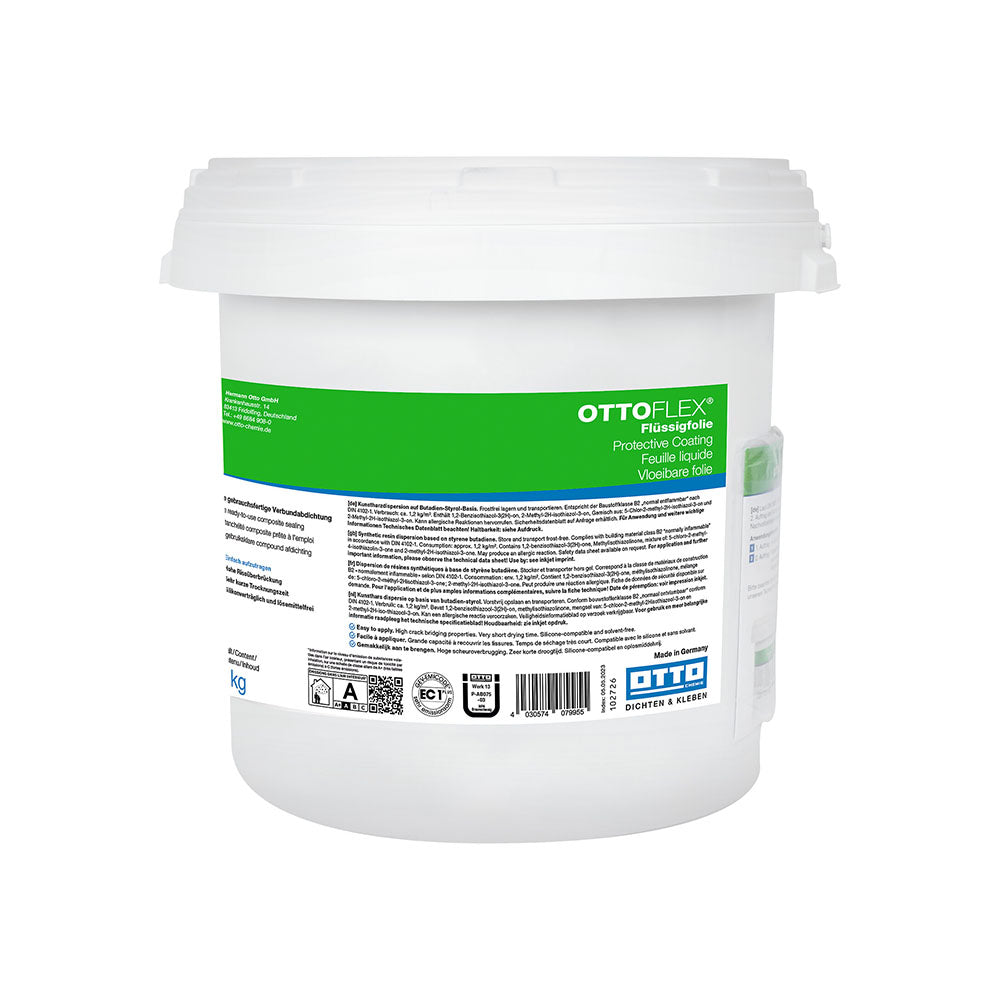
Liquid Waterproofing Membrane: This is the heart of the system. It's a paint-on liquid that dries to form a seamless, flexible, waterproof layer. Its elasticity is crucial to accommodate tiny movements in the building structure without cracking.
-
Waterproofing Primer: Often referred to simply as a primer, this is applied to the substrate before the membrane. Its job is crucial: it seals porous surfaces (like plasterboard or concrete), improves adhesion of the membrane, and creates a uniform surface. For particularly absorbent or tricky substrates, a deep primer might be necessary for effective penetration and sealing.
-
Reinforcing Tape / Sealing Tape: This flexible, waterproof tape (sometimes called a sealing strip) is used to bridge joints between different surfaces (like wall-to-wall or wall-to-floor corners), board joints, and around pipe penetrations or drains. It's embedded into the first coat of the liquid membrane to create a reinforced, watertight seal at these critical weak points.
-
Internal and External Corner Pieces: Pre-formed corners made from the same material as the sealing tape make achieving a perfect, leak-proof seal in tricky 90-degree and 270-degree corners much easier and more reliable than trying to fold the tape yourself.
Why is it Non-Negotiable?
-
Prevents Leaks: The most obvious benefit. Water will eventually find its way through tile grout (which is generally water-resistant, not waterproof) and even tiny cracks in tiles. A tanking membrane stops it before it reaches the vulnerable substrate.
-
Protects Structure: Water penetrating walls or floors can cause timber to rot, plasterboard to disintegrate, and metal fixings to rust. This can lead to expensive structural repairs.
-
Inhibits Mould Growth: Damp, dark spaces behind tiles are breeding grounds for mould and mildew, which can cause respiratory problems and other health issues, besides looking unsightly and smelling bad. Proper tanking prevents the moisture build-up that mould needs to thrive.
-
Ensures Longevity: A correctly tanked wet area will last significantly longer, ensuring your beautiful tiling job remains intact and functional for years to come.
-
Adds Value: A properly waterproofed bathroom or wet room is a significant selling point for a property.
Standard tile adhesive and grout alone are not sufficient waterproofing for wet areas like showers. You need a dedicated system – you need a tanking kit.
The German Premium Quality Difference: Why Settle for Less?
Now, you might see various tanking kits on the market at different price points. It can be tempting to go for the cheapest option. As a German craftsman, this is where I urge caution. There's a reason "German Engineering" is a globally recognised mark of quality, and it applies just as much to construction chemicals as it does to cars.
What sets German Premium Quality tanking products apart?
-
Rigorous Standards & Testing: German manufacturers often adhere to stringent DIN standards (Deutsches Institut für Normung) and undergo rigorous internal and third-party testing for performance, durability, and safety. This means the product does what it says on the tin, consistently.
-
High-Grade Raw Materials: Premium products use higher quality polymers, fillers, and additives. This translates to better elasticity (crucial for crack-bridging), stronger adhesion, greater water resistance, and longer service life. Cheaper alternatives might use inferior ingredients that become brittle, lose adhesion, or degrade over time.
-
Optimised Formulations: German companies invest heavily in R&D. Their formulations are often optimised for specific applications and substrates, ensuring maximum performance. The liquid membrane might have better coverage, the primer might penetrate more effectively, and the sealing tape might offer superior flexibility and bonding.
-
System Compatibility: When you buy a German quality tanking kit, you're often buying a system where the primer, membrane, and sealing tape have been specifically designed and tested to work together flawlessly. This eliminates guesswork and potential compatibility issues that can arise from mixing brands.
-
Reliability & Peace of Mind: Ultimately, using premium German products gives you confidence. You know you're using materials designed to last, minimizing the risk of costly failures and repairs later. For a professional tiler, this means fewer callbacks and happier clients. For a homeowner, it means lasting peace of mind.
Think of it like choosing tools. A cheap hammer might drive a nail, but a quality German hammer feels balanced, transfers energy efficiently, and lasts a lifetime. The same principle applies to the materials protecting your home from water damage. Investing a little more upfront in quality saves you multiples of that cost down the line.
Spotlight on Quality: Exploring Tanking Solutions at Sealantstore.ie
This philosophy of quality is why I trust and recommend sourcing materials from specialists like Sealantstore.ie. They understand the importance of reliable construction chemicals and focus on providing professional-grade products.
Looking specifically at their Tanking Collection, you can see they offer components designed for robust waterproofing solutions. While specific brands might vary, the emphasis is generally on systems that embody the principles of German quality we've discussed:
-
High-Performance Liquid Membranes: Expect to find membranes offering excellent elasticity, crack-bridging capabilities, and good coverage rates, ensuring a durable, seamless barrier.
-
Effective Primers: Including options like deep primer designed for challenging or highly porous substrates, ensuring the membrane bonds securely for maximum protection. A good primer is the foundation of the system.
-
Robust Sealing Tapes & Corners: The collection includes essential sealing tape (or sealing strip) and pre-formed corners. These are critical for reinforcing those vulnerable joints and junctions, preventing leaks where different surfaces meet or where pipes exit the wall. The quality of the tape’s fleece and waterproof layer is paramount for embedding correctly and ensuring a lasting seal.
By choosing products from a curated source like Sealantstore.ie, you're gaining access to systems trusted by professionals, ensuring you're not compromising on this critical stage of your project.
Choosing the Right Tanking Kit for Your Project
While quality is paramount, you also need the right kit for your specific needs. Consider these factors:
-
Area Size & Type: Are you tanking a standard shower enclosure, a walk-in shower, a full wet room floor and walls, or just the area around a bathtub? Kits come in different sizes, specified by the coverage area of the liquid membrane (usually in square metres). Ensure you buy enough to cover the required area with two coats, plus extra for overlaps and potential touch-ups. A specific shower tanking kit might be sized perfectly for a typical shower area.
-
Substrate: What surface are you applying the tanking system to? Common substrates include plasterboard (standard or moisture-resistant), tile backer boards (cement-based or XPS foam), concrete, or existing tiles (if prepared correctly). The substrate influences the type of primer needed (standard vs. deep primer) and may affect adhesion. Always check the kit manufacturer's instructions for substrate compatibility.
-
Kit Type: While liquid membrane kits are most common for DIY and standard professional use due to their ease of application and ability to form a seamless layer, sheet membrane systems also exist (often used in larger commercial projects). This guide focuses on liquid tanking kit systems typically found at suppliers like Sealantstore.ie.
-
Included Components: Check that the kit contains everything you need for your specific layout – enough sealing tape, the correct number of internal and external corners, and potentially pipe collars if required. Sometimes these need to be purchased separately.
Using a complete tanking kit from a reputable source simplifies the selection process, as the components are designed to work together. It avoids the risk of using an incompatible primer with a membrane, for instance.
Step-by-Step Guide: Applying Your Tanking Kit Like a Pro
Alright, let's get practical. As a tiler, precision and following steps are second nature. Applying a tanking kit requires the same meticulous approach. Always refer to the specific manufacturer's instructions for the kit you purchase, but here’s a general guide based on my experience with quality systems:
Step 1: Preparation is Everything!
-
Clean: The substrate must be spotlessly clean, dry, and free from dust, grease, loose particles, or old adhesive residues. Hoover and wipe down the surfaces thoroughly.
-
Repair: Fill any holes, cracks, or voids in the substrate with a suitable filler and allow it to cure completely. Ensure the surface is sound and stable.
-
Smooth: The surface should be reasonably smooth. Any sharp edges or protrusions should be sanded down to avoid puncturing the membrane or tape.
Step 2: Priming the Surface
-
Apply the primer evenly across the entire area to be tanked using a roller or brush, as per the manufacturer's instructions. Pay extra attention to absorbent surfaces like standard plasterboard or concrete – a deep primer might be specified here.
-
Allow the primer to dry completely. Drying time varies depending on the product, temperature, and humidity. Do not proceed until it's fully dry to the touch and no longer tacky. This step is crucial for adhesion.
Step 3: Reinforce Joints and Corners with Sealing Tape
- Apply a generous first coat of the liquid membrane along all wall-to-wall joints, wall-to-floor joints, board joints, and around any pipe outlets or fixtures.
-
Immediately embed the sealing tape / sealing strip into the wet membrane, ensuring there are no air bubbles trapped underneath. Use a trowel or scraper to press the tape firmly into the membrane, ensuring the liquid oozes through the tape's mesh or fleece.
- Use the pre-formed corners for internal and external angles, embedding them in the same way.
- Overlap tape sections by at least 50mm (2 inches).
- Apply another layer of liquid membrane over the top of the embedded tape and corners, fully encapsulating them. Feather the edges out onto the wall/floor.
Step 4: Apply the First Coat of Liquid Membrane
- Once the taped areas are touch-dry (refer to instructions), apply the first full coat of the liquid membrane to the entire area using a medium-pile roller or brush.
- Apply evenly and ensure you achieve the minimum coverage rate specified by the manufacturer (often expressed in kg per square metre). Don't spread it too thin!
Step 5: Apply the Second Coat
- Allow the first coat to dry completely. Again, drying times vary (can be several hours). It often changes colour slightly or becomes touch-dry.
- Apply the second coat, preferably in a direction perpendicular to the first coat (e.g., if the first coat was applied vertically, apply the second horizontally). This helps ensure complete coverage and minimise pinholes.
- Ensure you achieve the total required thickness/coverage for the two coats combined.
Step 6: Drying and Curing
- Allow the final coat to dry and cure fully before attempting any tiling. This can take 12-24 hours or longer, depending on conditions and the specific product. Be patient! Tiling too soon can damage the membrane.
Step 7: Inspection
- Once fully cured, inspect the membrane carefully. It should be a uniform colour and free from any holes, tears, or gaps. Touch up any suspect areas if necessary and allow them to cure.
Post-Tiling Sealing:
-
Remember that the tanking system works behind the tiles. You will still need to use a quality waterproof tile adhesive suitable for wet areas and flexible, mould-resistant grout.
-
Crucially, seal the internal corners and the junction between tiles and the shower tray/bath with a high-quality sanitary caulk (silicone sealant). This provides the final line of defence and accommodates movement. Products for this are also available at specialist stores like Sealantstore.ie.
Common Mistakes to Avoid When Tanking
Having fixed many leaking showers over the years, I've seen where things go wrong.
Avoid these common pitfalls:
-
Inadequate Preparation: Dust, grease, or dampness on the substrate will compromise adhesion. Skipping repairs leads to weak spots.
-
Skipping the Primer: Especially on absorbent surfaces, skipping the primer (or using the wrong one, like not using a deep primer when needed) can lead to the membrane not bonding correctly or drying too quickly without forming a proper film.
-
Incorrect Tape Application: Not embedding the sealing tape fully into the wet membrane, leaving air bubbles, or not using it on all joints and corners is asking for leaks. These are the most vulnerable points.
-
Applying Membrane Too Thinly: Trying to stretch the product too far results in a weak membrane that doesn't meet the required waterproof rating or thickness. Always apply two coats to the manufacturer's recommended coverage.
-
Insufficient Drying Times: Tiling before the membrane or primer is fully cured can trap moisture or damage the uncured layer. Patience is key.
-
Using Incompatible Products: Mixing a primer from one brand with a membrane from another can lead to adhesion failure or chemical reactions. Stick to a tested system, ideally from a single tanking kit.
-
Ignoring Pipe Penetrations: Forgetting to seal properly around pipes using appropriate collars or sealing tape techniques creates obvious entry points for water.
-
Not Reading the Instructions: Every product is slightly different. Always read and follow the specific manufacturer's guidelines for your chosen tanking kit.
Real-Life Examples / Mini Case Studies
Example 1: The Savvy DIYer
- John, a homeowner in Cork, decided to renovate his ensuite. He researched thoroughly and understood the importance of waterproofing. He chose a premium German tanking kit from Sealantstore.ie, followed the instructions meticulously, paying close attention to the primer application on his plasterboard walls and careful embedding of the sealing tape. Years later, his shower looks as good as new, with zero signs of leaks or dampness. His investment in a quality kit gave him lasting peace of mind.
Example 2: The Professional Finish
- Mary, a building contractor in Dublin, was commissioned for a high-end wet room. Knowing her reputation depended on a flawless finish, she specified a German-engineered liquid tanking system sourced via Sealantstore.ie. The ease of application of the system, including the deep primer for the concrete floor and the perfectly formed corner pieces, saved her team time. More importantly, the guaranteed watertightness meant a happy client and no costly callbacks.
Example 3: The Cautionary Tale
- A homeowner tried to save money by using only "waterproof" grout and adhesive in their new shower, skipping a dedicated tanking kit. Within 18 months, tiles started coming loose, and mould appeared along the floor-wall joint. Investigation revealed extensive water damage to the timber stud wall behind. The cost of stripping out the tiles, replacing the damaged substrate, correctly tanking the area, and re-tiling far exceeded the initial cost of a quality tanking kit.
Tanking Kits: Pros and Cons
Pros:
- Complete System: Ensures all components (primer, membrane, sealing tape) are compatible and designed to work together.
-
Essential Protection: Provides the necessary waterproof barrier to prevent leaks, structural damage, and mould.
-
Cost-Effective (Long-Term): The cost of a kit is minimal compared to the potential cost of repairing water damage.
-
Peace of Mind: Knowing your wet area is properly sealed provides invaluable confidence.
-
Professional Standard: Using a tanking system is standard practice for professional tilers and builders.
Cons:
-
Initial Cost: Represents an additional upfront cost compared to just buying tiles and adhesive (a false economy!).
-
Requires Careful Application: Not difficult, but requires attention to detail and following instructions precisely. Mistakes can compromise the system.
-
Quality Varies: Significant differences exist between cheap, basic kits and premium German quality systems. Choosing wisely is crucial.
Frequently Asked Questions about Tanking Kits
Q: Can I tile directly onto the tanking membrane?
A: Yes, absolutely. Once the membrane is fully cured according to the manufacturer's instructions, you can tile directly onto it using a suitable cement-based waterproof tile adhesive.
Q: How long does tanking last?
A: When applied correctly using high-quality materials like those premium German brands often represent, a tanking system should last the lifetime of the tiled installation itself – potentially decades. Its longevity depends entirely on proper application and the quality of the tanking kit components.
Q: Do I need to tank the entire bathroom?
A: It's essential to tank shower areas (walls and floor if a tray isn't used), wet room walls and floors, and the walls around bathtubs (at least up to shower head height and along the bath edge). Tanking the entire bathroom floor can provide extra protection, especially with wooden subfloors, but is often considered optional outside the main wet zones. Always check local building regulations or best practice guidelines.
Q: What's the difference between a tanking kit and just using waterproof adhesive/grout?
A: This is a critical distinction! Waterproof adhesives and grouts are designed to resist water penetration but are generally not 100% waterproof, especially grout, which can develop micro-cracks over time. A tanking kit creates a continuous, impermeable membrane barrier behind the tiles, stopping any water that gets past the grout or tile. They serve different functions.
Q: Is a shower tanking kit different from a general one?
A: Often, a shower tanking kit is simply a tanking kit sized appropriately for a standard shower enclosure (e.g., covering 5-10 square metres). The components (primer, membrane, sealing tape) are usually the same high quality, just in quantities suitable for that specific application.
Q: Can I use a primer from Brand X, membrane from Brand Y, and sealing tape from Brand Z?
A: It's strongly discouraged. Components within a tanking kit are tested as a system. Mixing brands can lead to incompatibility issues, adhesion problems, or chemical reactions that compromise the waterproofing. Always use the matched components provided in the kit or recommended by the manufacturer.
Conclusion
Waterproofing your shower, wet room, or bath surround isn't an optional extra; it's a fundamental requirement for a successful, long-lasting, and healthy installation. A comprehensive tanking kit provides the essential components – primer (including deep primer where needed), liquid membrane, sealing tape/sealing strip, and corners – to create that vital waterproof barrier.
As we've discussed, while kits are available at various price points, opting for German Premium Quality, like the systems available through specialists such as Sealantstore.ie, is a wise investment. The superior materials, rigorous testing, and system compatibility offered by these products provide reliability and peace of mind that cheaper alternatives simply cannot match. Remember the meticulous preparation, the crucial role of the primer and sealing tape, the need for two coats of membrane, and adequate drying times. Avoiding common mistakes is just as important as following the correct steps.
Don't let a small saving upfront lead to major costs and headaches down the line. Protect your home, your investment, and your health by doing it right the first time.
Ready to guarantee a leak-free, beautiful wet area for years to come? Explore our curated selection of German Premium Quality tanking solutions. Get your amazing tanking kit for high-class projects at Sealantstore.ie today! Visit the Tanking Collection now.
Don't mess about ;-)
Do an excellent job!